
I know it sounds counterintuitive to decorate the interior (and some of the exterior) of the dollhouse while it is still in pieces but, trust me, you will understand in a minute. Many kits contain instructions that tell you to assemble the house first and then tell you at the very end to “decorate any way you want to.” TRUST ME…decorating to the degree I’m about to discuss will make this project SO much easier.
(Check one more time now to be sure all edges have been sanded to avoid splinters. Also, if you plan to wire your house for electric lighting, the electrical tape that carries the wire from the future location of the ceiling light or lamp must be installed according to the manufacturer’s directions prior to installing wallpaper. Common places for light fixtures are on the ceiling of a room or anywhere you plan to place a lamp, such as next to a bed or on a table next to a sofa or chair.)
Let’s talk about the interior surfaces first. Remember that we are only working with the major pieces of the house now…all small trim pieces should still be attached to the board sections, not punched out, and set aside for now.
Whether you plan to wallpaper, paint, or stain interior walls, ceilings, and floors, the job is more easily accomplished while the house is still unassembled because you will be working with pieces that can be laid flat on a work surface, and have no connecting, adjacent surfaces that have to be taped off and avoided.
For instance, painting walls after assembly means taping off the floor AND ceiling to avoid getting wall paint on those surfaces (particularly if you plan to stain the floors…just try getting all of an accidental paint spill off of unfinished wood!) But if you paint the walls prior to assembly, no taping off of surrounding surfaces is necessary. This saves SO much time later! ONE MORE IMPORTANT THING…save your leftover paint when you are finished. You will need it for touch-ups after assembling the dollhouse.
If wallpapering, this step is even more important. When trying to wallpaper an assembled dollhouse, attempting to cut a piece of wallpaper to exactly fit some of the many angles that can occur in an assembled dollhouse (particularly when working around the ceilings of the top floor) is enough to make anyone give up. But working with a single, flat piece means you can lay the wall section directly on the wallpaper on a work surface and use it as a template, tracing around the wall section and inside of any windows onto the wallpaper.
(I like to shop at wallpaper stores in the bin where they sell spare, single rolls that have small prints for about $1.00. This wallpaper is sturdy and easier to work with, without tearing it. I once found a large roll of wallpaper with a tiny raised, embossed tile-look that I have used for literally years for bathroom and kitchen floors. It is sturdy enough to be painted any color I choose. But I also shop for decorative papers, sold by the sheet, at arts and crafts stores if I need something very special.)
HERE WE GO!
You may need a partner to help you with this part. Find all floor, wall, roof, and ceiling pieces and place them on your work surface. Study the directions to determine which pieces will actually fit together and where they will connect. Hold together as many pieces as possible in order to determine which parts of each piece will “belong” to the same room once the house is assembled…and lightly mark each side and section (upstairs and downstairs) of each piece with a pencil so you can identify which room they belong to, and if it is an INTERIOR or EXTERIOR side as you paint and wallpaper the sections. (Ex: “Interior Living Room Wall” or “Interior Child’s Bedroom Wall” or “Upstairs Interior Hall Wall”)
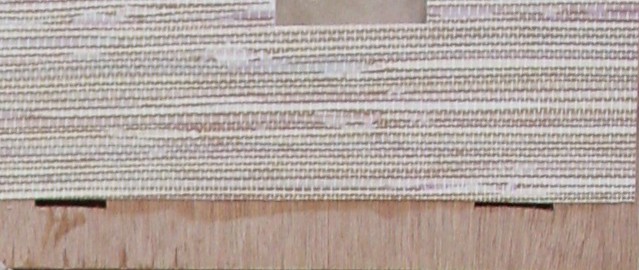
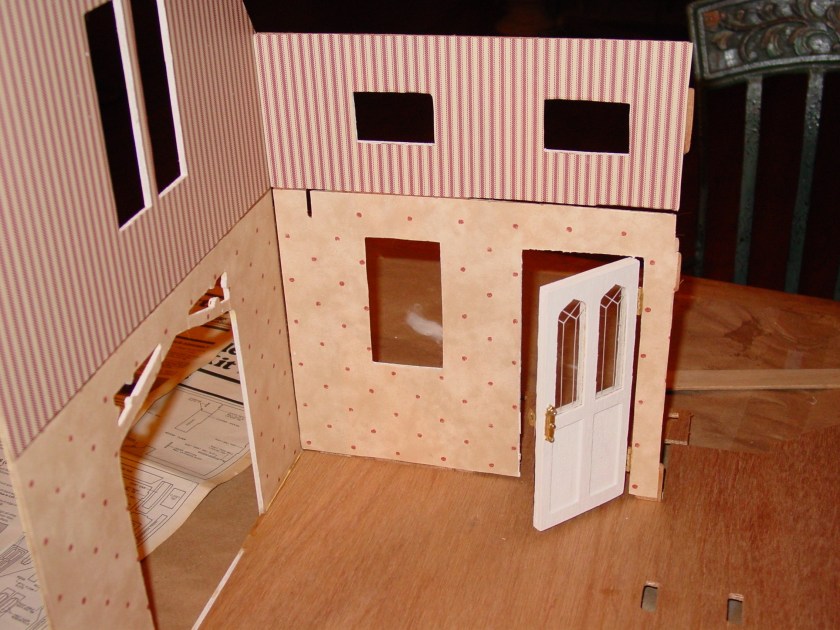
In most cases, the tall walls comprise both a first and second story wall (and sometimes the attic, too), meaning they include a downstairs room, an upstairs room, and an attic. Most kits will have notches in those walls where the upstairs and downstairs floor tabs will be inserted during assembly. The TOP edge of that notch is the exact line where the upstairs and downstairs floors will connect to that room. This is important to note because, when pre-painting or wallpapering the walls, you will need to know where to stop painting or wallpapering at the bottom of the wall for a particular room. (See, in the picture below, that the wallpaper for an upstairs bedroom STOPS AT THE TOP OF THE NOTCH THAT WILL HOLD THE TAB of the piece that comprises both the FLOOR of the 2nd story and the CEILING of the 1st story.)
Likewise, the BOTTOM edge of the notches that will hold the upstairs floor/downstairs ceiling is the line that indicates where the paint or wallpaper for downstairs rooms should stop at the ceiling.
DO NOT PAINT INSIDE THE NOTCHES THAT WILL HAVE FLOOR OR WALL TABS INSERTED INTO THEM DURING ASSEMBLY! AND DO NOT PAINT THE TABS EITHER! Most kits are designed for those tabs to fit tightly and a coat of paint can prevent the tabs from fitting inside the notches. A bit of paint touch up may be required later around the notches but, again, DO NOT PAINT INSIDE THE NOTCHES OR ON THE TABS.
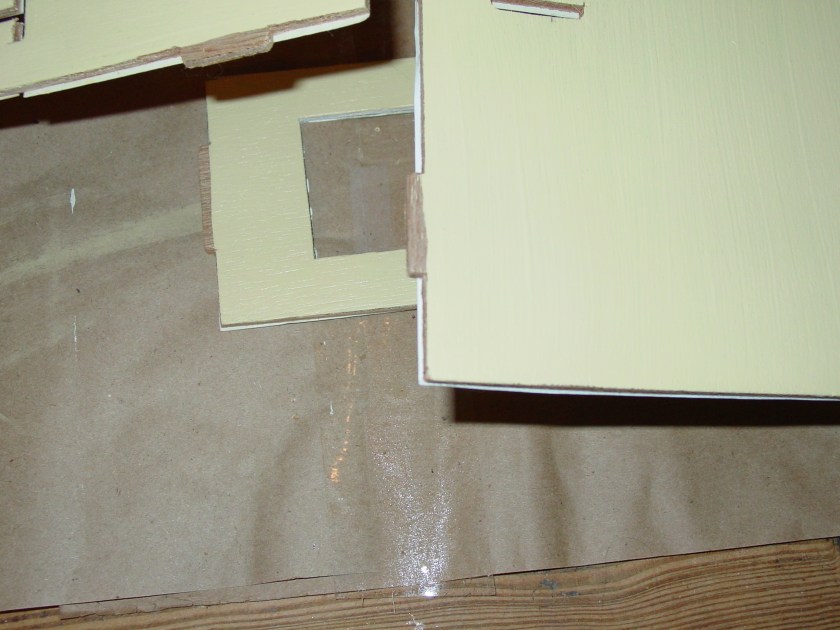
Here is an example of an interior wall that has had wallpaper attached for the downstairs and upstairs rooms, while the attic wall has been painted white. This is all one piece of wall section. The notches for the floors, which are visible in this picture to the far left and right, allowed me to determine where to stop or start wallpaper and paint.
(I like to place my wallpaper decorative side down on my clean work surface and trace on the back side to avoid pencil marks on the decorative side that may show once the house is assembled. This means determining which side of the wall piece will be on the INTERIOR of the house once assembled and placing the INTERIOR side FACE DOWN on the backside of the wallpaper.)
Once I trace the template, I allow for the fact that my pencil marks are ever so slightly outside the actual size of the wall so I cut out the wallpaper piece just barely inside the pencil lines to achieve a perfect fit. When gluing the wallpaper to the dollhouse wall, I like to use a slightly watered-down white glue. It spreads nicely (I like to use my fingertips), doesn’t stain, and with the small amount of added water you get a bit of “working time” before the glue sets up in case you have air bubbles underneath that need to be pushed out. If this is the case, work gently with your fingertips, pushing the air pocket from the center of the piece to the outside edges.
NOTE: If your wallpaper has a horizontal effect such as the dots shown in the picture above, take care to place your various walls for that room on the wallpaper (prior to marking it as a template) in such a way so that the pattern lines up when the house is assembled. For instance, you may choose to place a row of dots right at the floor level for each separate wall section.
I like to hold up my walls occasionally while painting and wallpapering just to be sure I haven’t mis-marked any wall sections.
Once you have painted or wallpapered all sections, don’t forget to paint or stain the floor/ceiling sections. THAT’S RIGHT! With the ground level floor, you only need to paint or stain the floor that will be visible on top (the underside will be under the house). But the floors for the second level and attic have an underside that will become the ceilings for the first and second floors and they need to be painted at this point, too. Some people prefer to use commercially-produced floor treatments for dollhouses, such as tiny tiles or hardwood floors. Now is the time to glue those on as well. Take care NOT to attach raised level floor treatments where interior walls need to rest as this will make a perfect assembly impossible. Notches in the floors indicate where interior walls will be placed so hold the interior wall in position and use a pencil to lightly draw a line on the floor where both sides of the wall will be so you will know where to stop your floor treatments.
(I like to use a small square sponge loaded with various paint colors to “stamp” ceramic tiles for some floors. I will cover this in a later blog.)

THE EXTERIOR:
- If you plan to paint the exterior walls of the house, paint them NOW (TWO coats of paint) and save some of the paint for touch ups later. REMEMBER: DON’T PAINT THE INSIDE OF ANY NOTCHES AND DON’T PAINT THE TABS THAT GO INTO THE NOTCHES!
- If using commercial sheets of faux brick or wood made for dollhouse WALL exteriors, use the wall sections as templates to cut the sheets of faux brick or wood now, making sure that you cut the sheets so that the sheets fit the EXTERIOR side of the wall, not the interior. DO NOT ATTACH the sections of faux brick or wood NOW. You will do that once the house is assembled.
- If you are an advanced builder, and plan to attach individually applied pieces of strip wood to mimic clapboard, that will be done AFTER the house is assembled, not NOW.
Now, paint the interior underside (interior ceiling) and edges of ALL ROOF sections at this point. The color you choose will become the color of the eaves of the house once assembled. We will not be applying a roof-type treatment to the exterior of the roof pieces until the house is assembled. So don’t worry about that now. We will discuss this in Step 5.
These steps can take some time so don’t expect to accomplish it all in one day. Just relax knowing that, when you do assemble the house, it will already be decorated. And that is so much FUN!
Copyright 2017

Bless you, this is very helpful.
LikeLike
Did you ever do a post on how to use a small square sponge to “stamp” ceramic tiles for a floor? Thanks.
LikeLike
I haven’t posted that yet because I didn’t realize anyone was interested in that but since you are I’ll post directions soon. I’ll need to set up a demonstration so I can take pictures.
LikeLike
I will do that this week. I’m sorry. 3 different family members got terminal illnesses back-to-back-to-back and I was the only family member willing to take care of them so I’ve had my hands So very full. Stay tuned. It’s about to get posted.
LikeLike
The post about stamping floors is published. Sorry for the delay. Life went a bit off the tracks for awhile.
LikeLike