
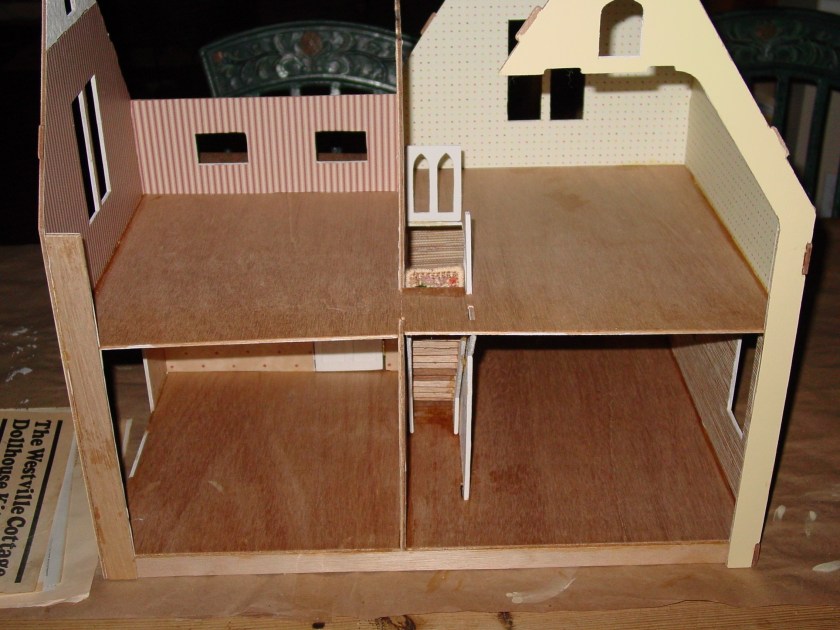
Since different manufacturers of doll house kits create different floor plans, you will now need to follow their directions for attaching the walls, floors, and roof parts together. (DO NOT attach roof parts to the house until reading Step 5, the post immediately following this one, as it will describe roof decoration and assembly issues.)
Here are quite a few tips for this part of the process.
First and foremost, while directions can vary and some will tell you to use hot glue for assembly while others will recommend wood glue…
DO NOT USE HOT GLUE TO ASSEMBLE YOUR DOLL HOUSE!!!!!!!!!!!!!
Do Not, Do Not, Do Not use HOT GLUE!
Whew…I hope I just made my point.
While I understand the convenience of using hot glue (it dries quickly so you can assemble the house quickly) IT WILL NOT HOLD UP OVER TIME AND YOUR HOUSE WILL FALL APART.
At Building Faith Play Therapy Toys, my nonprofit that provides doll houses to abused children in recovery to be used for therapy, we partner with many community groups that volunteer their time to construct dollhouses, which we then decorate for the individual child’s needs. I always visit with these groups and give them the Dos and Don’ts of construction and I always say, “Use wood glue only.” In spite of that, we do get houses returned to us that were put together with hot glue. They are already falling apart when we get them. (I had one literally fall apart in my car on the way back to the office from picking it up.) Then we spend about 3 weeks disassembling the house, scraping off the remnants of hot glue, and using wood glue to reassemble the house.
Trust me. It isn’t fun and I don’t recommend it to you either.
Sooooo, the assembly of a doll house must be done with wood glue if you want it to be stable enough to touch when you finish it.
This means you are in for slow progress as you will find that you can only glue two or three pieces together at a time and then you must wait for the glue to dry…sometimes for 5-6 hours. You also may need to clamp some sections during the glue drying process.
Ho-hum. But whatever will you do in the meantime?
Well, you have at least these two things you could be doing during the process of gluing major house sections together and waiting for glue to dry that will prepare you to jump right in with the next steps once your major house sections are totally glued together.
First of all, I like to assemble the staircase while glue is drying on major wall sections, assuming there is a staircase. Most directions call for you to glue each individual tread to one stringer, wait for the glue to dry, and then glue the other stringer to the opposite side. (This is when it REALLY gets tempting to use hot glue. DON’T. I put a staircase together with hot glue once…it fell apart in my hands as soon as I picked it up.)
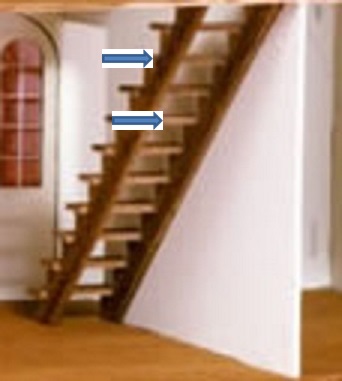
FYI: The TOP blue arrow identifies one of the 2 side stringers. The LOWER blue arrow identifies a tread (or stair step).
(NOTE:When gluing the treads to the first stringer, the treads have a tendency to topple or lean over…until the glue starts to set up. I have solved this problem by placing a piece of brown craft paper on a flat surface and running several strips of double-sided sticky Scotch Tape side-by-side on the craft paper. Place the first stringer on the tape. The tape holds the stringer steadily in place as well as the treads, on their end sides, while the glue dries. Then you can gently peel the entire assembly off of the tape once the glue has dried completely. Just make sure that your treads are evenly spaced at 90 degree angles so they will fit against the second stringer when you are ready to attach it later. I hold my second stringer up to the treads that have been glued to the first stringer BEFORE the glue dries completely in case I need to readjust the position of any of the treads to fit the second stringer before the glue is permanently dry on the first stringer.)
Once all of the glue is dry, the stairs can be painted or stained according to your decorating scheme. (At my nonprofit, we customize all of our staircases with handmade needlepoint stair runners that match the decor of the house. Our patterns are all our own original designs. Some are for sale on eBay if you want to try to make you own and wish to see some of our patterns. Use search terms “dollhouse stair runner” under seller name “malyopal” to find them.)


Now your staircase is built and ready to install when you reach that point in your particular kit’s instructions!
The second thing I like to do to keep myself busy while waiting for wood glue to dry on each new section that is being added to your house is sand and paint all of the window trim, door trim, decorative wood trim, and exterior trim pieces that, heretofore, are still attached to the wood sheets that they were packaged in. Up to now, we have left them alone so as to avoid getting these pieces mixed up.
I like to find a quiet work space where they will not be disturbed. I tape a piece of brown craft paper to the surface. I then punch out each of the trim pieces, one at a time, and carefully sand the edges to remove splinters. Once each piece has been sanded I carefully lay it on the craft paper and LABEL IT by writing on the craft paper so that I don’t forget what each piece is. I then overlay the craft paper with wax paper so that, as I paint each piece and put it back down in its place to dry, it will be on top of the wax paper next to its labeling so I still know what it is and it won’t stick to the craft paper. (And I can see my labeling of each piece through the wax paper.) This may seem like a lot of effort but some kits contain a LOT of trim pieces and you don’t want to get confused about which piece goes where later.
So there you have it! Two projects that can keep you busy while you wait for wood glue to dry as you attach walls to floors, one-by-one…using WOOD GLUE for a permanent hold.
(Have I said WOOD GLUE enough now?)
And the best part is, when your assembly is complete, your previous work of wallpapering and painting the interior and exterior BEFORE assembly now pays off because your house is ALREADY DECORATED! Aren’t you glad?


Copyright 2017
