
While there are many floor coverings you can buy to make the most out of decorating each room, there are several advantages to creating your own designs with a few inexpensive supplies.
- Doing it yourself is less expensive than purchasing specialty items.
- If you have any doors that open to the interior of the house, some purchased floor coverings can be so thick that you might have to cut off a portion of the bottom of the door(s) to allow for the increased height of the floor if it is covered with something thicker than the door(s) will allow.
- By doing it yourself you can customize or color the floor in each room to coordinate perfectly with the other decorative elements.
So in this segment I will show you how to create both a wood plank “look” and a ceramic tile “look” with simple acrylic paint, a kitchen sponge, a brown pencil, a touch up paint brush, and Mod Podge (or similar product). I am using the floor of a doll house that will be the ceramic tile kitchen floor on one side and the living room wood floor on the other side.
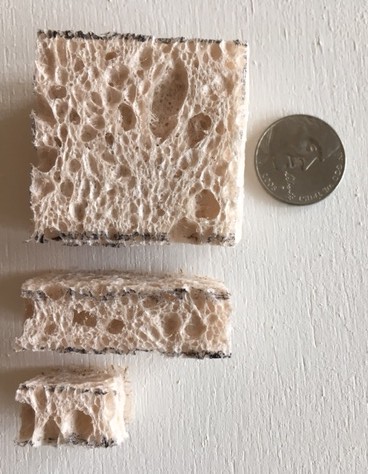
First, take a regular kitchen sponge and cut it into 3 pieces, making sure the corners are squared at 90 degree angles. (Note the texture of this sponge that is pictured. This texture makes great tiles.) I like to cut the main sponge into a 1 1/4″ square, then I cut a second piece that is 1/3 the size of the main sponge, and a third piece that is 1/2 the size of the second sponge. The 2 smaller ones will probably come in handy for edges and corners but you will mainly be working with the largest square piece of sponge. We will use these on the kitchen floor later so set them aside for now.
Let’s start with the wood plank floor. Use blue painter’s tape to divide the entire floor piece into 2 sections…the kitchen (which we will do later) and the living room. There will be slots in the floor where the dividing wall between these 2 rooms will be placed as you assemble your doll house later. Place the edge of the tape on the kitchen floor side so that the edge runs vertically right down the middle of those slots (see picture below).
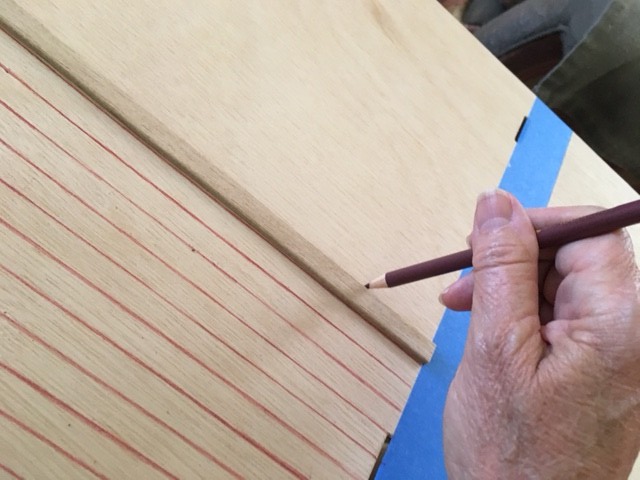
Using your brown pencil (which will need to be sharpened a few times during this process), and a long straight edge (like a trim piece or a yard stick) as a guide, draw straight lines evenly and horizontally (side to side) across the entire depth of the living room floor. You can decide how wide you want your planks to be depending on your taste.
Next, use the brown pencil to draw random vertical lines to denote the edges of the planks.

At this point, if you like the color of the wood then just apply 2 even coats of Mod Podge to finish it. However, if you want a darker floor, you can add a tablespoon of brown acrylic paint to approximately 3/4 cup of Mod Podge, mixing well. (I like a semi-gloss look but can only find Mod Podge in Matte or Gloss finishes so I simply mix equal parts of both finishes to create the semi-gloss look I prefer.) The Mod Podge will make the brown paint transparent and you can then paint the mixture evenly across the entire floor. The plank lines will show through the transparent mixture. If that is dark enough for your taste then apply a second, plain coat of Mod Podge (straight from the regular container…don’t use the mixture that includes the brown paint). If you want the floor to be darker however, then apply a second coat of the Mod Podge mixture that includes the brown paint.
There are many variations on this process…color, finish, plank size, etc. Try them all!
You are finished with your plank floor!
Wait for the plank floor finish to dry thoroughly before continuing.
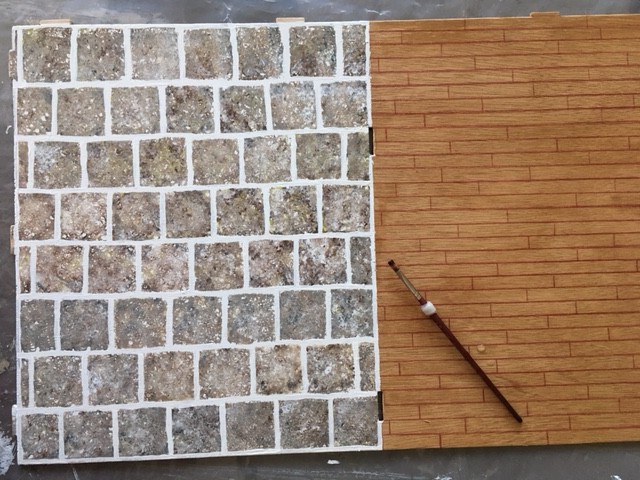
Now that the plank floor is dry, remove the blue painter’s tape and apply a new piece of tape so that it protects the edge of the plank floor closest to the kitchen floor and exposes the total surface of the kitchen floor.

Paint the kitchen floor with 2 coats of acrylic or latex paint in a color that you want your grout lines to be. Let dry THOROUGHLY. I chose white. Reserve some of this paint to touch up the grout lines later.

Note the supplies in this picture above that you now need to gather.
- your 3 sponges
- a container of water for keeping your sponge damp and for rinsing it when it gets overloaded with paint
- a paper plate to use as a paint palette
- latex gloves (unless you want to get a manicure when this is finished)
- paper towels (just in case you spill or drip the water)
- And finally…the acrylic paint. Any brand will do. You can buy these at an arts and crafts store. You definitely need the color white to use as a base for the additional colors and I find that my favorite additional colors for ceramic tiles include brown, black, yellow, and red. (For this demonstration we are not using red. If you DO want to use red, make sure you always add a bit of yellow paint or the red will turn out looking pink. The yellow will cancel that out.)
Now, on your paper plate squirt swirls of paint, starting with the white, like this:
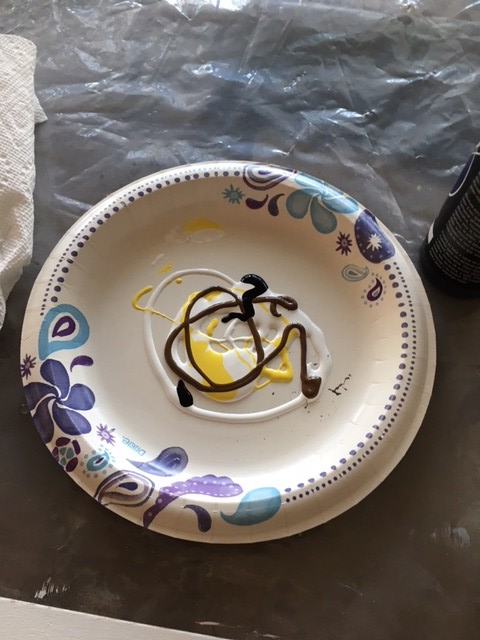
Note that there is more white than the other colors and go easy with the black…a little bit goes a long way. Now use a tool (I use a Q-Tip) to swirl the colors JUST A BIT, like this:
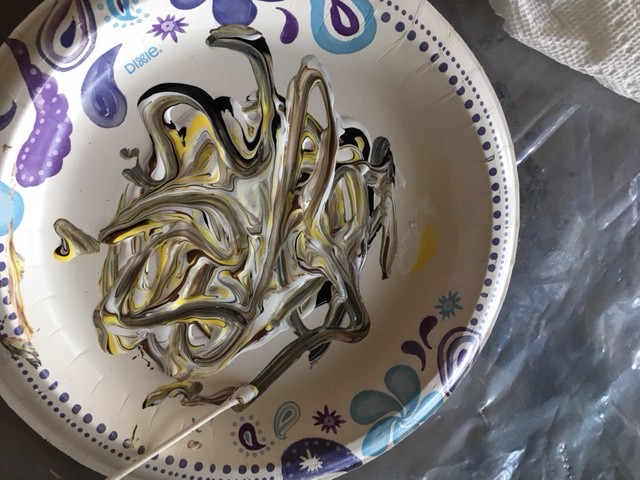
Now, using your dampened (and squeezed out) main square sponge, blot the sponge onto the paint in an up-and-down motion. It should look like this:
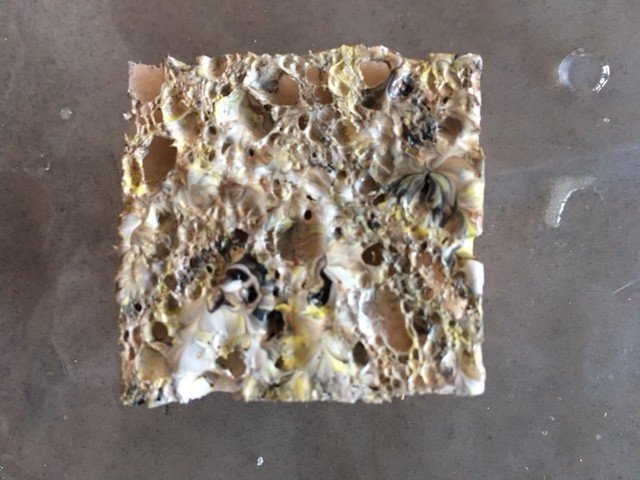
Use your finger to pat the paint straight down into the sponge. Each application of paint in this manner should be enough to produce at least 4-5 tiles on the kitchen floor. (At this point, you may want to do a test of this stamping process on a piece of plain paper just to see what you will be doing to the real floor.) Position the sponge on the floor on the first row and gently pat it down on all the corners. Then raise the sponge, turn it 1/4 turn and press it down on the same spot again for more natural coverage. Move it over, leaving space for the grout line, and repeat.

The edges won’t be perfect but remember that you saved some of the background color to touch up the grout lines when you are finished stamping tiles. Continue this process until the entire floor is covered. You will need to rinse your sponge 2-3 times during this process because it will get too overloaded with paint eventually and the tiles will begin to look “muddy”. Also, refresh the paint on your palette as needed.
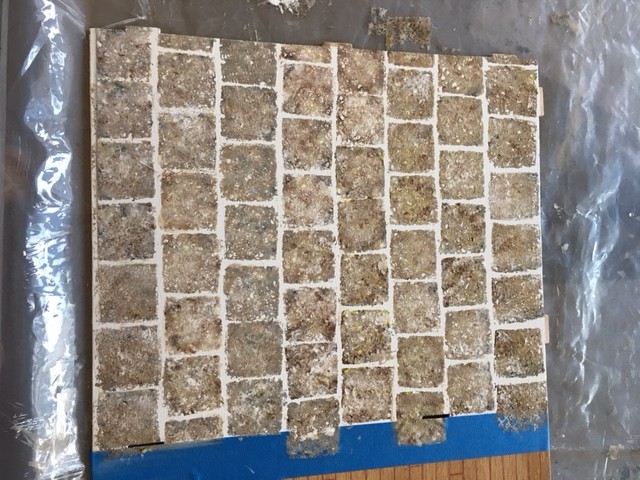
Allow time for all of the paint to dry and then remove the painter’s tape. Using your small tipped paint brush and the background “grout” paint, touch up the grout lines so that they are fairly even and cover up all of the tile paint that accidentally “bled” over onto the grout lines.
When the grout lines are dry, apply a coat of Gloss Mod Podge evenly over the kitchen floor to protect the finish.
Congratulations! Your main floor is gorgeous! Send me your pictures when YOUR floors are finished!
Copyright 2020 All Rights Reserved
