
Just as it is with a regular home under construction, once you have assembled your dollhouse, it is time for a “walk-through” to make your punch list of the little things that need attention to ensure a finished product you can be proud of.
First, pick up your dollhouse by the sides and shake it a bit to see if anything rattles or sounds loose. You may need to re-glue some pieces.
As I said in an earlier blog, this is the time to do paint touch-ups with the paint you saved when you originally painted all of the surfaces prior to assembly.
Here are a few things to look for.
- Look for all of the holes where notches were inserted into tabs during assembly. Fill the holes with wood putty and allow to dry. Then sand the putty until it is smoothly flush with the wall around it and use your leftover paint to paint over the dry wood putty and any glue that may be left behind from the assembly process.


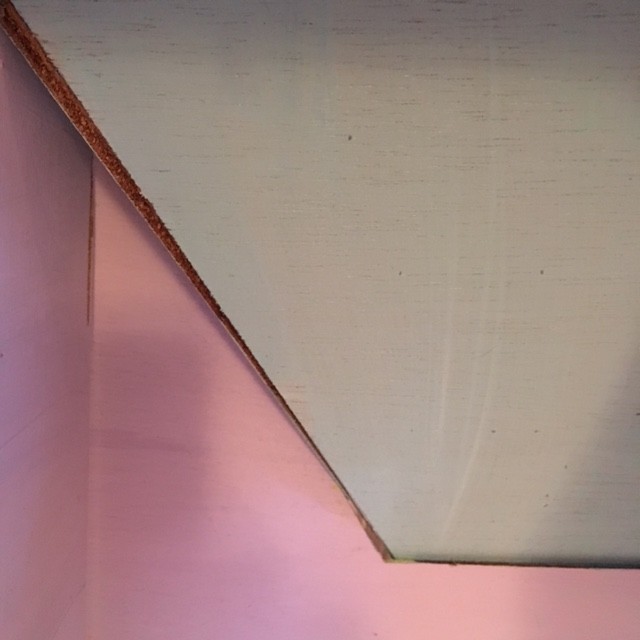
2. Check the interior walls and ceilings to see where paint touch-ups may be needed. Here is an example where the edges of the gabled roof pieces need some touch-up paint. Look over the entire dollhouse carefully. It is very easy to miss something.
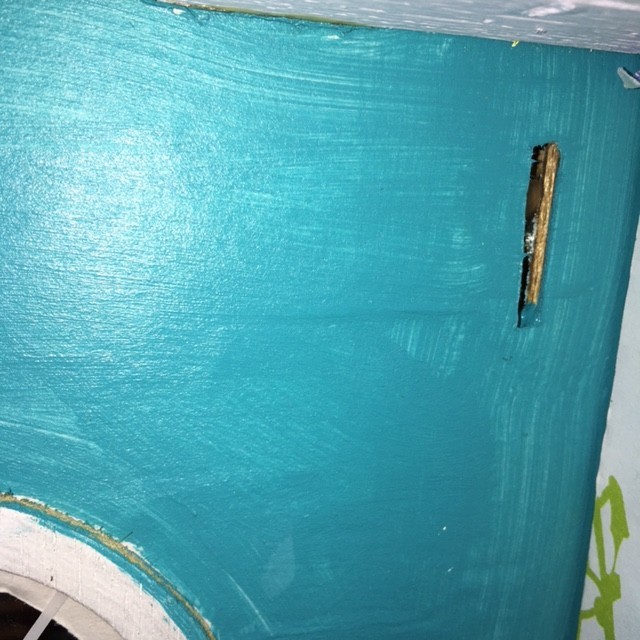
3. Check your painted areas one more time to see if the color looks smooth and even. If you used a darker color, and didn’t apply 2 coats of paint, this is what you will see. Take note of the unevenness of the color plus the touch-ups needed around the window trim. (This type of mistake is a clear indication that this room was painted AFTER assembly and illustrates why I strongly recommend decorating your walls BEFORE assembly.) Also note the tab/notch area that needs to be puttied, sanded and painted.
How many items can you add to your punch list in this one picture alone? Do you see the importance of painting the EDGES of ALL trim pieces BEFORE attaching them? I see at least 8 missed edges and areas. Trust me when I say, it is SO much easier to paint these edges BEFORE assembly rather than to try to do it now. (How steady is your hand and how tiny is your paint brush? Painting edges after assembly is very tedious.)

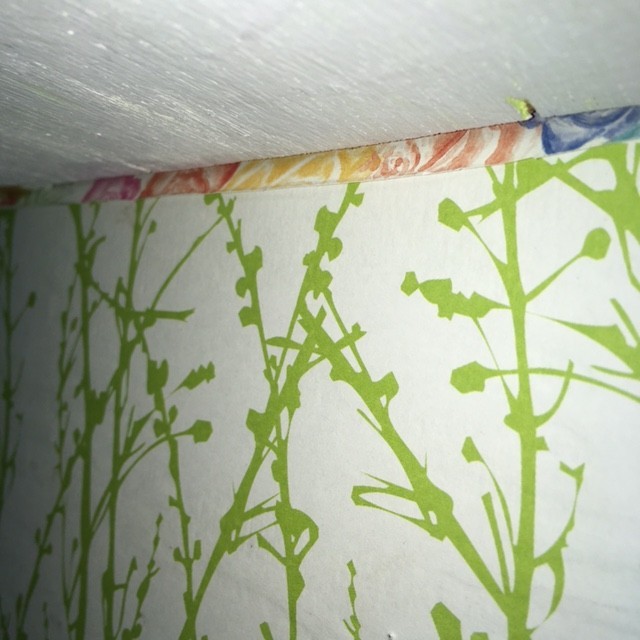
4. As you were decorating the house walls PRIOR to assembly, did you stop your wall upstairs wallpaper edge at the top edge of the notches (that anchor the piece that is both the ceiling for downstairs rooms and the floor for the upstairs rooms) OR at the bottom edge of that same notches for downstairs rooms? If not, this is what you will be dealing with now. (See below.) The wallpaper from the upstairs bedroom wasn’t stopped at the top edge of the notch for the upstairs floor. Hence, a half-inch of the bedroom wallpaper from upstairs now emerges at the top of the living room wall. It isn’t fun trying to remove that little strip of wallpaper without damaging the wallpaper underneath it because the glue will cause the intended wallpaper underneath to tear. If you have done this, my suggestion is to add crown molding to cover your mistake.
Finally, make sure that the wall and floor EDGES that face you as you look at the dollhouse interior rooms are all painted. I can’t count the number of dollhouses I’ve seen in my life that had some painted edges and some that were not painted. It makes for a very unpolished finished look.
Copyright 2017
