
Depending on the style of your dollhouse, you have to decide what type of roof material would enhance the finished look.
For beginners, if you search online for “embossed wallpaper”, you can find rolls that have small, raised squares that resemble asphalt shingles common on modern houses these days. This is an easy way to achieve a natural look.
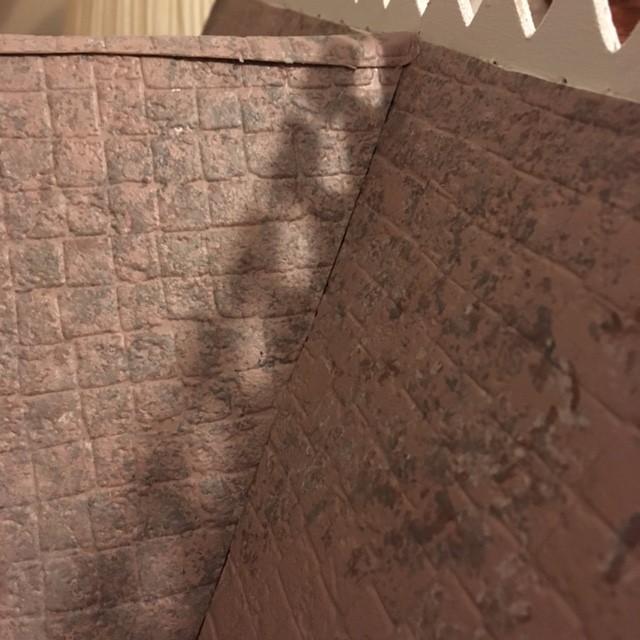
- I “custom-color” them by sponge-painting the wallpaper with a slightly damp sea wool sponge dipped in the colors I choose to blend with the house. The sea wool sponge texture creates the speckled look of asphalt shingles very easily. (Ex. Below- black, brown, gray, and a little bit of white all applied to the sponge at the same time.)
- Sponge paint enough of the wallpaper so that you have enough to cover all exterior roof pieces.
- Allow to dry.
- Then use the roof pieces as templates, using a pencil to draw around each piece on the BACK SIDE of the wallpaper (after the paint has dried)…making sure that you place the EXTERIOR side of the roof piece DOWN on the BACKSIDE (the side you DIDN’T sponge-paint) of he wallpaper. Be sure you place the roof pieces on the wallpaper in a level (90 degree) fashion so that the “shingles” will all run at a level horizontal way once applied to the roof piece.
- Cut out all of the pieces of wallpaper. Do NOT apply to roof sections yet.
- Assemble the roof according to the kit directions. Use WOOD GLUE. Allow to dry.
- Apply each piece of sponge-painted wallpaper to its corresponding roof section with regular white school glue. Some trimming may be necessary. I use a 1 inch wide strip of leftover painted wallpaper to cover the roof peak, where needed. (See picture below.)
If you don’t feel you are ready to attempt sponge painting your roofing wallpaper, many arts and crafts stores carry specialty papers that are printed in patterns that can mimic roofing materials. Here are a few examples:


These decorative specialty papers would be applied to the roof pieces in the same manner as described above for the used of sponge-painted wallpaper. Just follow steps 4-7!
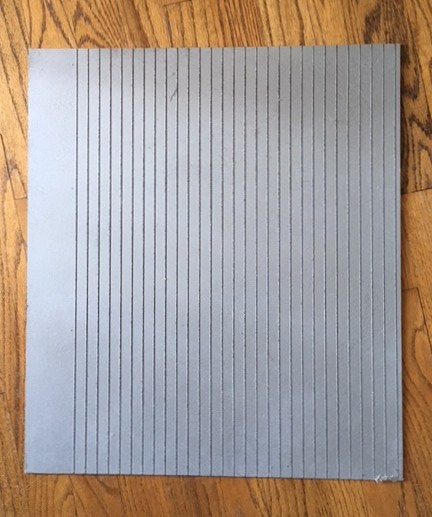
You can also buy craft wood sheets at arts and crafts stores and create your own roofing material, using the roof pieces included in the kit as templates to cut the proper shapes of any roofing material you choose. Here is craft wood with grooves painted silver to mimic a tin roof. Use craft wood that is 1/4″ or 3/8″ thick for best results.
Now, if you are more experienced with dollhouse construction, cottages, Victorians, and several other styles lend themselves to individual shingles…the type that are glued on one-by-one…by hand. If this is your first dollhouse, you may want to limit your choices to simpler methods and work up to shingles. But if you are willing to try this, here are a few tips.
- If you haven’t already done so, go ahead and attach the roof sections to the house according to the directions that came in your kit with wood glue and let dry.
- Make sure you have enough shingles. They usually come included in the kit but, if you are buying them separately, make sure you can obtain more of them if you underestimate how many you will need to finish and run out before finishing.
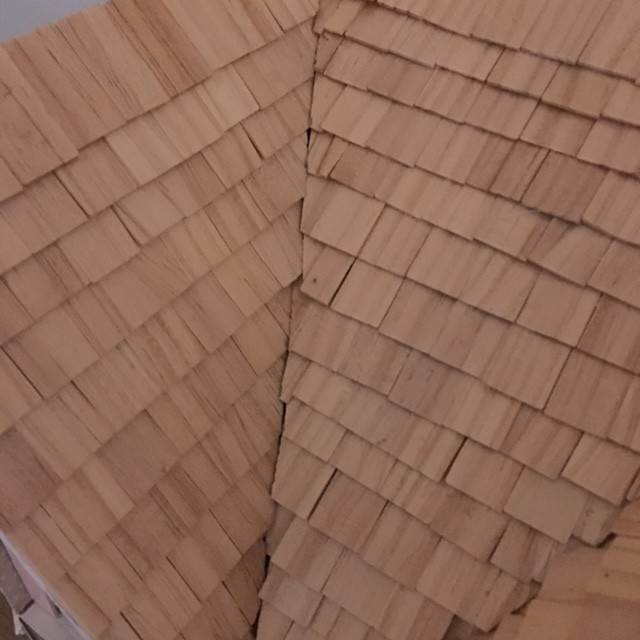
- Have a pair of sharp scissors available to cut the shingles at angles when you get to the gable edges. (See picture below.)
4. This is the ONE AND ONLY TIME I am going to recommend the use of hot glue…ONLY to attach shingles. Otherwise, you will be working on this part of the project for weeks..
5. Use a pencil and straightedge to draw LEVEL horizontal lines, about 1 inch apart, across roof sections so that they are aligned/straight across the entire roof, even as the roof sections change (for instance, at gables). These lines will make it easier to keep your shingles level as you work.
6. Start gluing on your first row of shingles at the BOTTOM edge of the roof so the each successive, higher row can OVERLAP the row below it slightly. Take your time. This takes skill. For a more natural look, make sure to stagger your shingles so that the spaces between shingles don’t all line up in perfectly straight vertical lines.
Now your house has a roof!! Stay tuned. We will begin to delve more deeply into decorating and furnishing the house using ideas you may not have thought of before. Your kitchen junk drawer is about to become a treasure trove.
Copyright 2017
